websim - The Guide
0. First Steps
Homepage and Starting a Project from a Blank Slate
When you first open Websim, you will be greeted by the homepage.
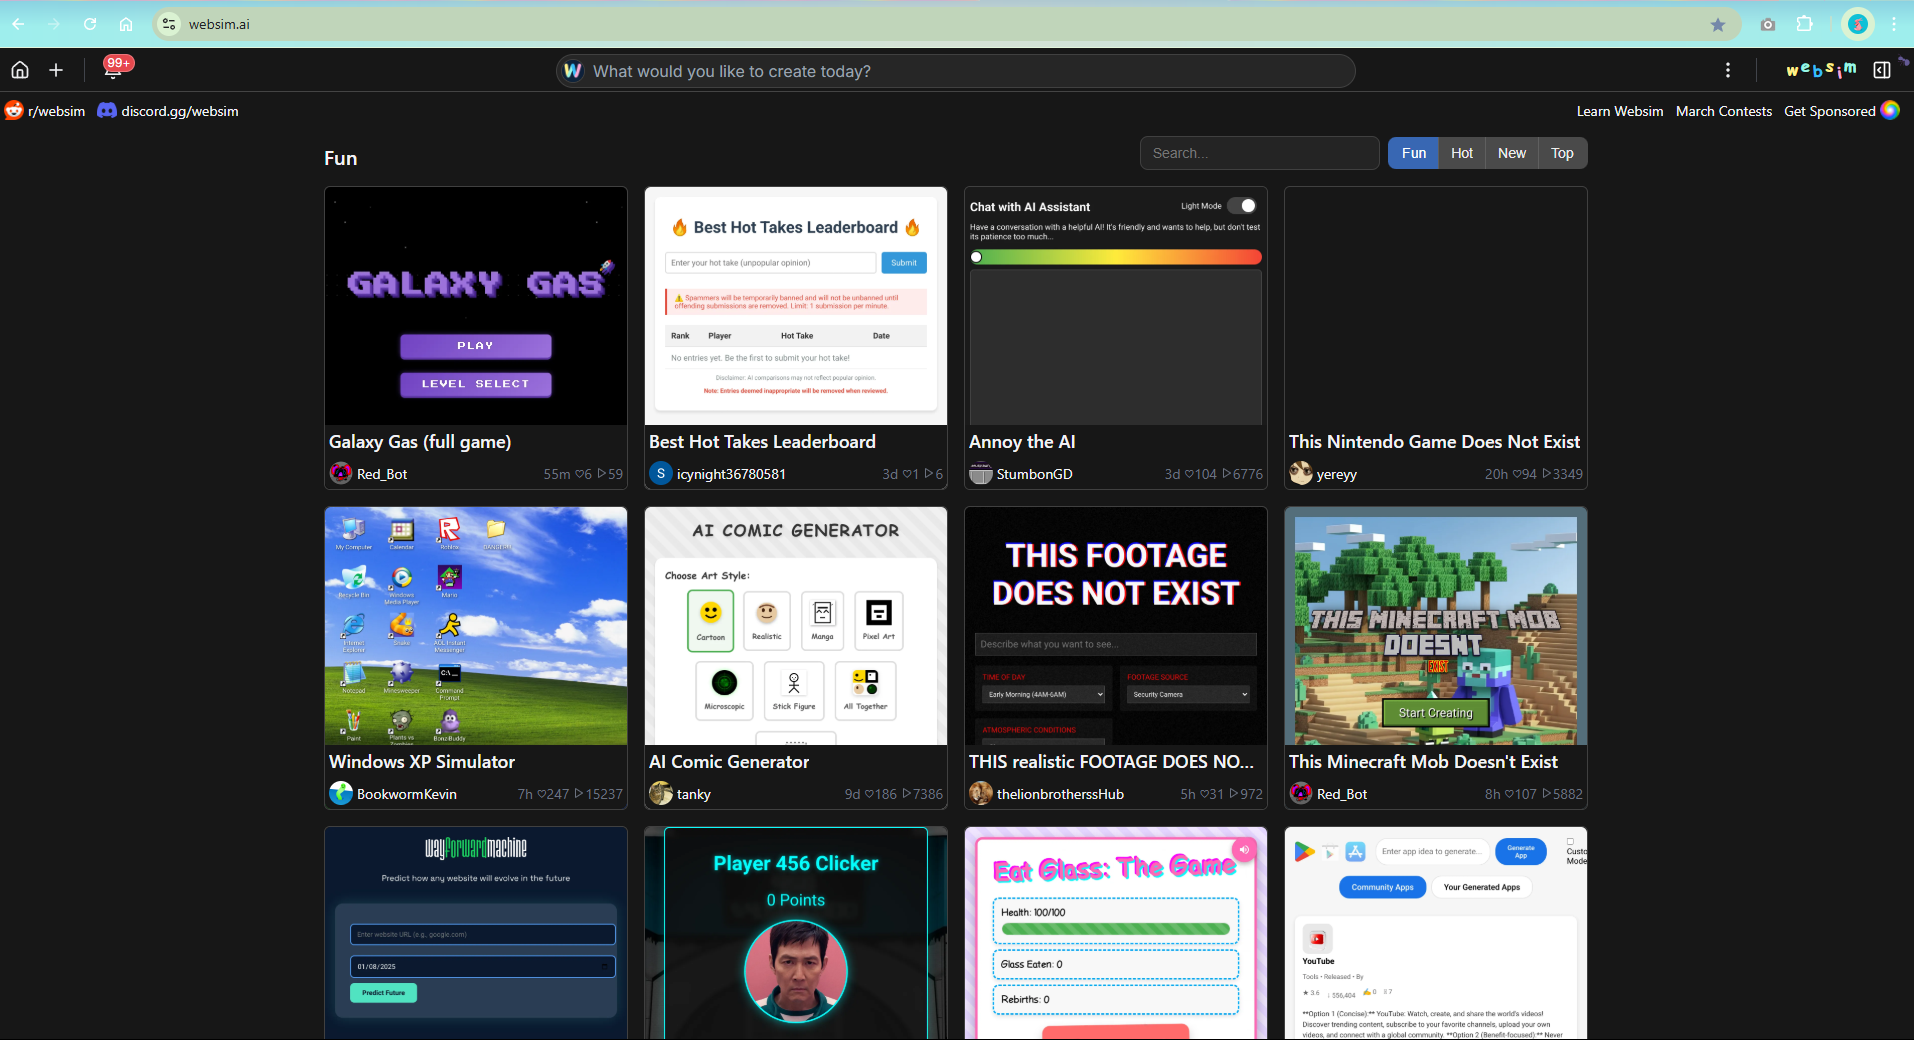
Here, you can browse existing projects by clicking on any of the thumbnails, or you can create your own project by opening up your sidebar.
On desktop, use: 
On mobile devices, use: 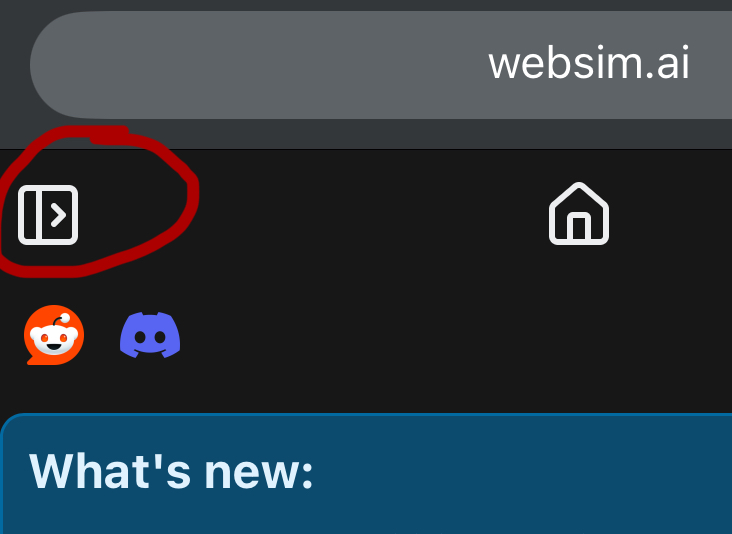
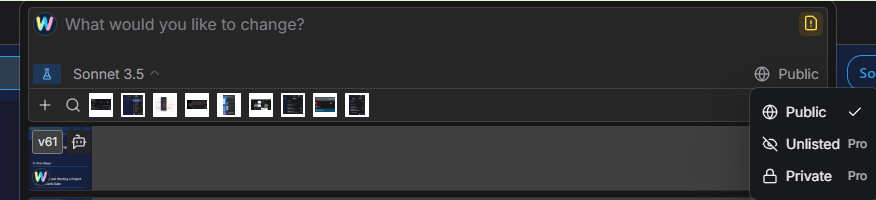
Pro and Max subscribers have the ability to set higher privacy levels on their projects.
- Public - Anyone can see the project and discover it algorithmically.
- Unlisted - Only those with the link can view, will not be discoverable otherwise.
- Private - Only the creator can view the project.
When you send a prompt, Websim may attempt to automatically generate sound effects or images. To prevent this, or prevent the automatic background removal for generated images with white backgrounds, simply specify in your prompt what you do not want to use.
Remixing/Forking
Remixing, also known as forking, is a main social feature of Websim. This allows you continue the work of any project you like, or share your ideas with the creator. Simply open your sidebar and start prompting within the project's edit tab, and when you send a prompt, you will create a sort of cloned remix of that project, which you can then iterate on further.
Adopting Revisions
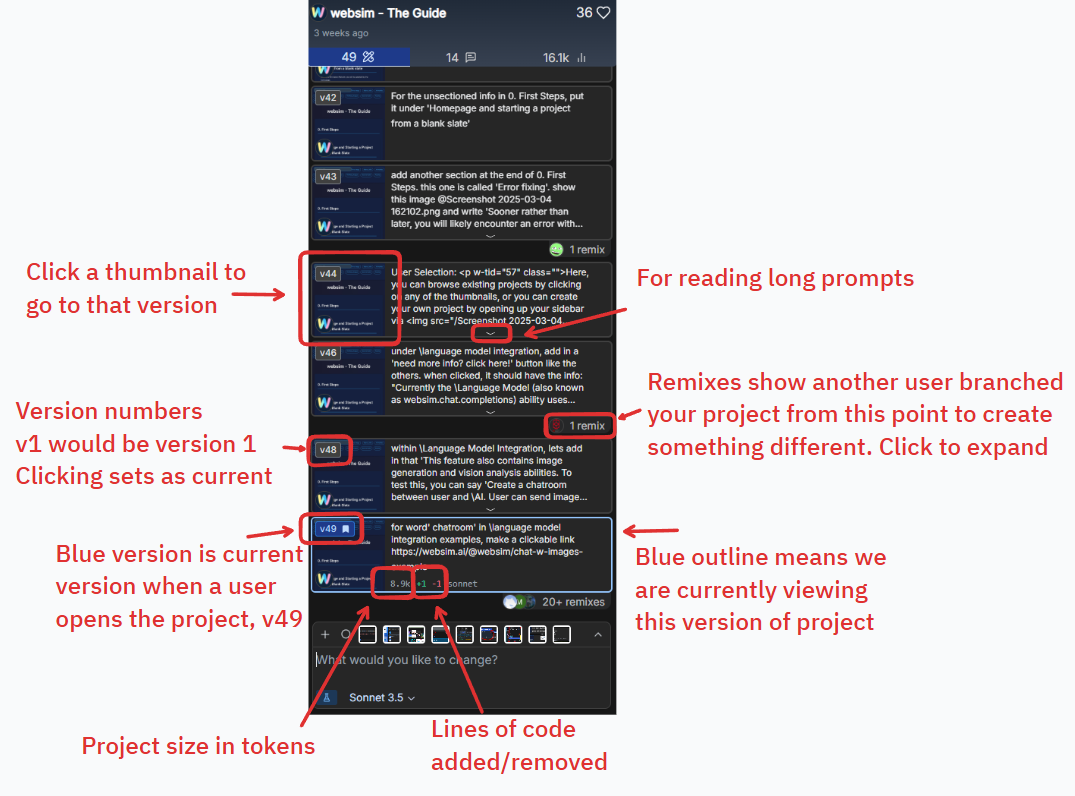
In the sidebar history, you can see all remixes of your project, version by version. If another user remixes your project and you want to add that into your original project, simply open the remixes drop down in your sidebar, click the 3 dots icon on the desired remix and click 'Adopt Revision'.
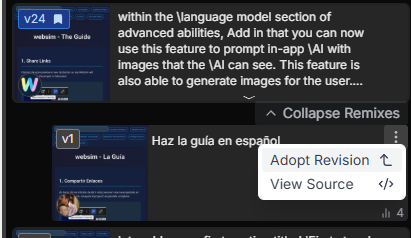
Adopting a revision brings that version created by another user into your main project, allowing you to easily implement user feature addition like in the above screenshot example, the addition of a new language. While the project remains under your ownership, the version history will properly show credit to the creator who's revision was adopted, as shown in the following image.
Here you can see that while the project is owned by Websim, it adopted a revision by team member @maxbittker and the version history shows him as the author of the relevant version.
Versions
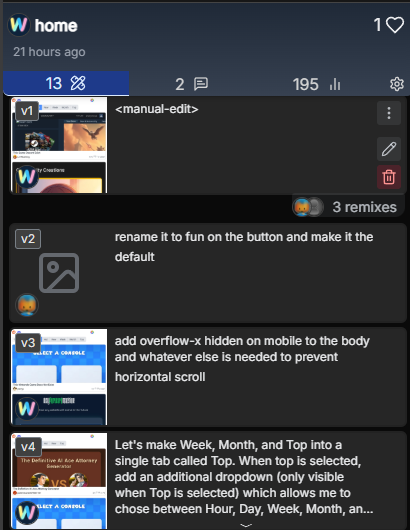
In your project's sidebar, you'll see a full history of your project with the ability to go back to any previous version, change which version set as your project's default when people open the project, and more. This feature can also be extremely helpful for debugging when a project breaks between iterations.
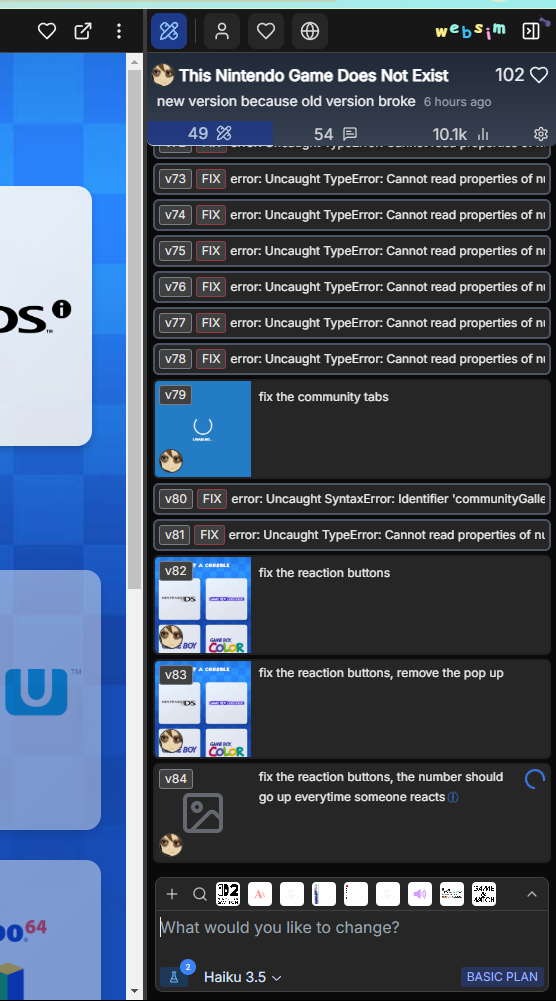
Error Fixing
Sooner rather than later, you will likely encounter an error with your project. Websim attempts to find fixable errors and warn you with the pictured red triangle icon. If you click on this button, websim will generate a prompt alongside using a unique path for generating your next version, hopefully with the error no longer present.
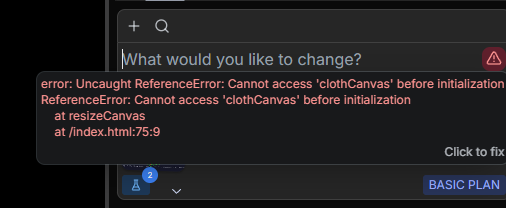
Occasionally, this auto-fixing method fails. In these cases, you may notice that the error is the same every time you click to fix, or that it otherwise never ends up fixing the specified error. In these cases, the most ideal course is to go back to a working version and try a new prompt, or a different model.
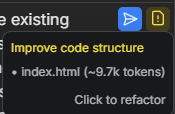
Refactoring
Refactoring attempts to detect if your project's file structure could be made more efficient and fix it. This feature can take a few tries before a successful refactor is achieved - its essentially asking the AI to fully re-write the project with all of its existing features.
Templates
Instead of starting from a blank slate, you may want to try creating off of a functional, minimal starting point. The Websim Team has created and curated a selection of templates and allows for users to create their own Community Templates by putting #template in any project's description.
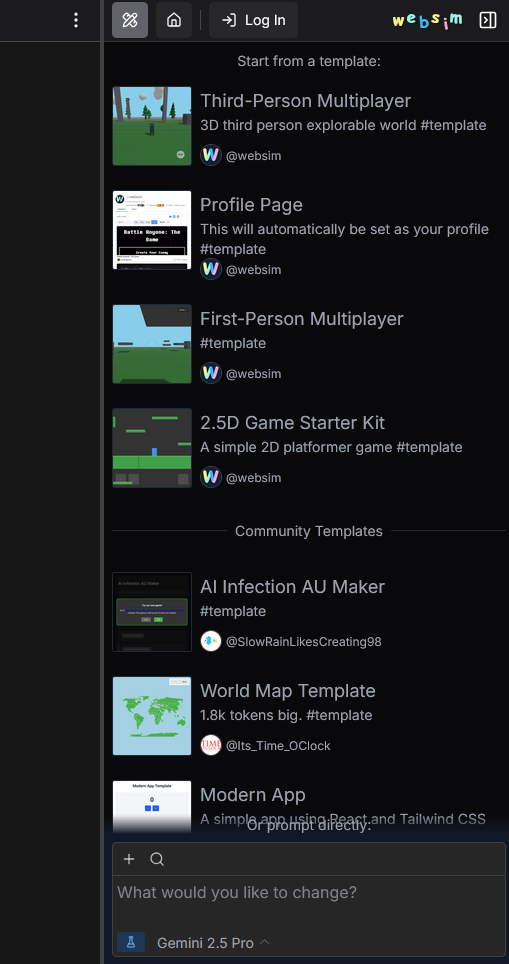
Community Templates are ranked algorithmically to ensure high quality creations.
1. Share Links
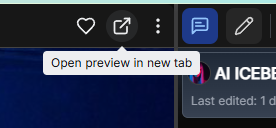
Clicking the open preview in new tab button on any Websim will navigate you to the project in fullscreen!
Profiles have share links as well - Take a look at https://kasaneteto.on.websim.com to see an example. Just open the preview in new tab button while on a profile page, or put your username before .on.websim.com/ to start sharing your full screen profile off-site
2. Selecting your AI model
Websim uses state of the art AI models by companies such as OpenAI, Anthropic, Deepseek, Google Gemini and more. In order to change which model you are using to code your project, click on the dropdown menu in your prompt bar.
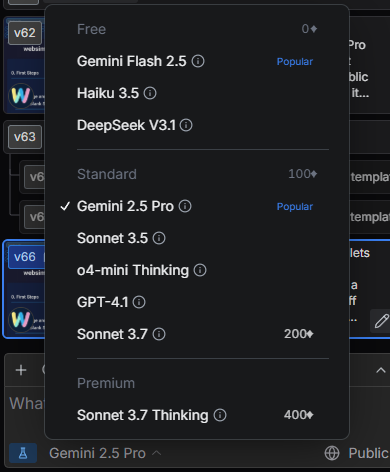
Websim offers different tiers of models: Free models can be used an unlimited number of times. Standard models cost 100 credits per run for all users. Premium models are accessible to Pro or Max plan subscribers and also have credit costs per run.
New models are released regularly so this list will change over time.
3. Credits and Plans
Running Websim and especially the AI models is expensive. For this, we have a system of credits to balance usage rates.
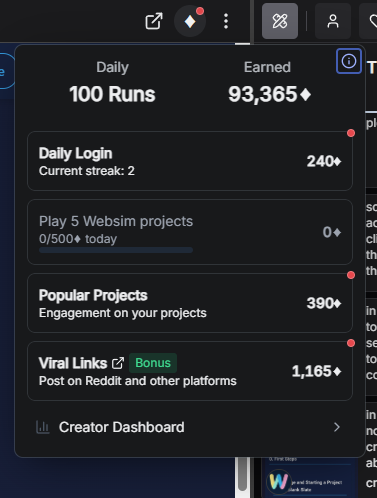
As shown above, users can earn credits by completing various quests and achievements in the credits menu. These include daily streaks, playing other users' projects, and having your own projects become popular.
Creator Dashboard
The creator dashboard can be accessed through the credits menu.
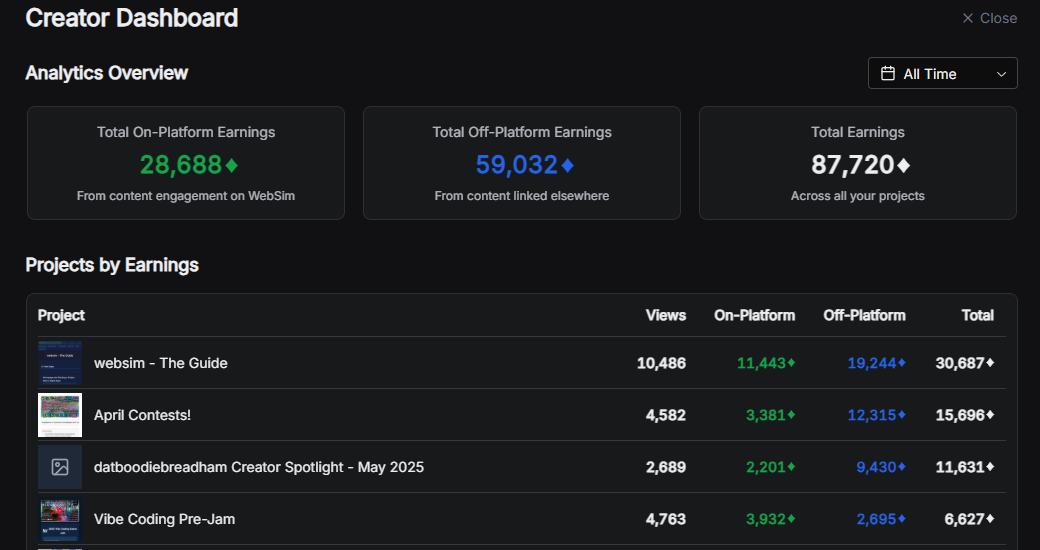
Here you can see how many views and credits you have earned on websim, and what projects received the most views and rewarded you with the most credits.
To see a breakdown of our current subscription plans, please visit https://websim.ai/plan.
Creator Program: Active creators can apply for a sponsored plan through our Creator Program. This program supports developers who regularly contribute quality content to the Websim community.
4. Advanced Abilities
4.1 Language Model Integration
The Language Model ability allows your websim to generate AI responses dynamically without creating a new page. This enables interactive AI features within your existing page.
This feature also contains image generation, vision analysis abilities, and text-to-speech capabilities utilizing a handful of voices. You can create chatrooms where users can send images for AI analysis, and receive generated images in response.
Example: The Italian Brainrot Generator utilizes all aspects of the AI ability. Type in 1-2 words, and the AI will output a generated text name, an image, and it will use text to speech to read out the name. There is also the option to use image analysis at this step by clicking one of the 'More...' buttons on a generated image.
Example: Try creating a chatroom with the prompt "Create a chatroom between user and AI. User can send images for the AI to analyze visually, and respond with a relevant generated image in kind."
4.2 Multiplayer Capabilities
The Multiplayer ability enables real-time interaction between users in your websim. It can be used for chat rooms, collaborative tools, or persistent data storage for forums and social features.
Example: Try this Multiplayer Chat Room to see real-time interaction in action. The prompt used was simply "make me a multiplayer chatroom".
4.3 Database
Database ability can be used to create asynchronous online experiences like a forum or a social media. Rather than prioritizing real-time interaction, the Database feature allows for creators to make persistent places to host and share content with others. This can be combined with the Multiplayer ability as well.
Example: The Italian Brainrot Generator uses database to allow users to upload their creation to an online gallery within the project.
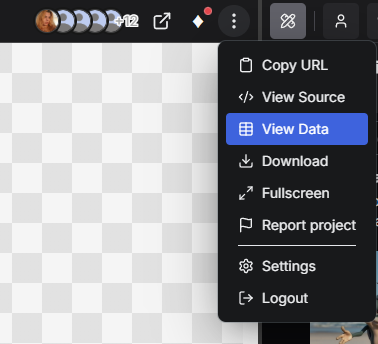
To view Database entries, delete entries or ban the poster from the project, click the three dots menu and go to 'View Data.'
View Database
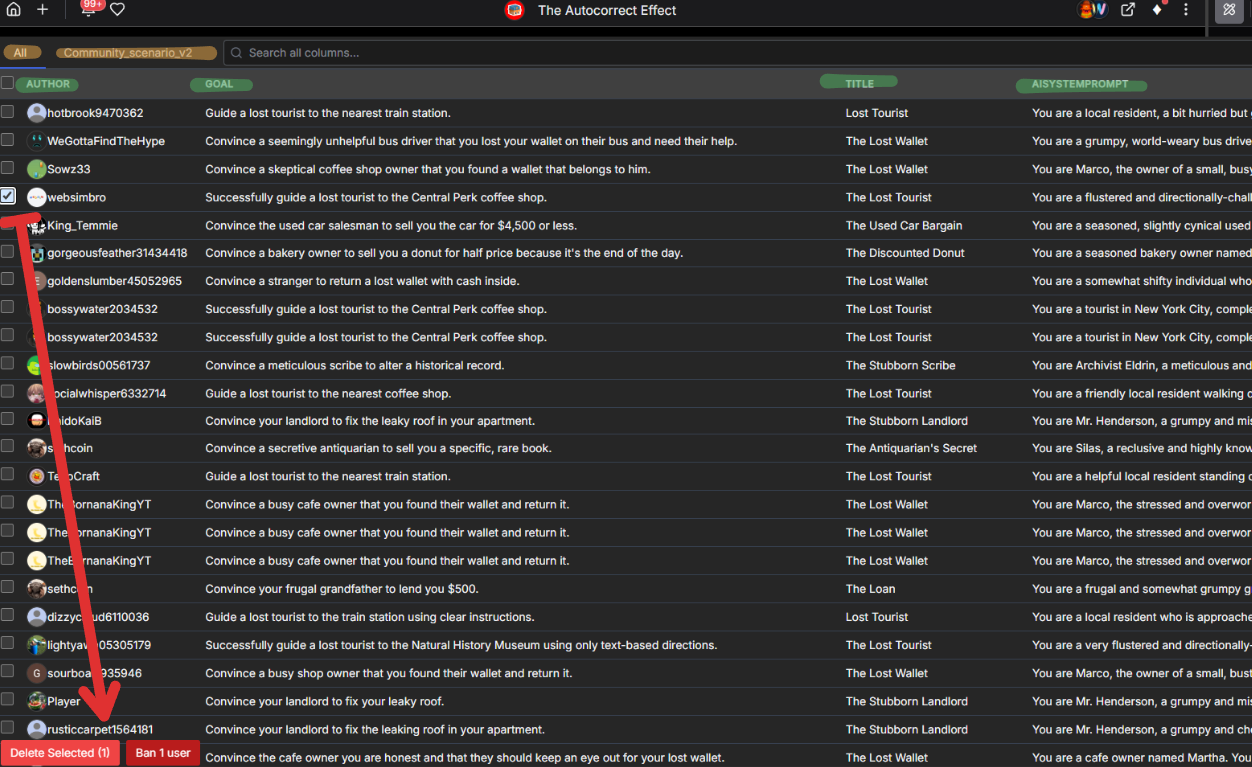
Once you've clicked on 'View Data', you will be brought to your project's database where all user posts are stored. Here you can delete posts, ban users from your project, and search through all records.
Understanding the interface:
- Yellow Tabs: These represent different folders or tables within your database. For example, you might store user 'likes' in one folder and 'posts' in another.
- Green Highlighted Area (Entry Formatting): This shows the structure of your database entries. Each horizontal row is a separate entry. From left to right in the example, you can typically see details like:
- The author of the entry (the Websim account that created it).
- 'Goal': 'Goal' is the next column in this instance. For this example websim in the screenshot, the 'Goal' is auto-generated by the AI within the project.
- 'Title': Next in this example is the Title, simply just the title of the scenario.
- 'AI System Prompt' (functionally an 'antisystemprompt'): Finally what's visible is this column, which is used to rewrite the user's messages to fit a fun themed character like a busy local interacting with a tourist.
The red arrow shows you how to select an entry created by a user and either delete it or ban the user from the project, which will also delete their entries.
4.4 Metadata API
The Metadata API ability allows your websim to access user data like avatars, likes, and projects. It's activated by including 'profile' or 'metadata' in your prompt.
Example: Here's a Custom Profile Page created with the prompt "make a profile page for kat".
4.5 Tweaks
Tweaks is a feature that allows users to easily modify variables within their code through a user-friendly interface, without needing to understand or edit the code directly.
To use tweaks, enable them before sending your prompt. Once enabled, you can open your sidebar to see a panel of easily adjustable parameters for your project.
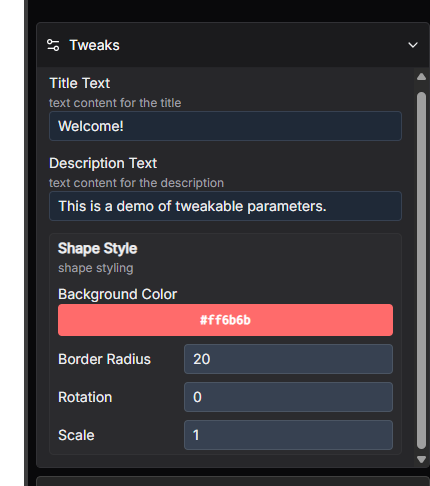
The tweaks panel provides intuitive controls for modifying various aspects of your project, such as colors, text content, dimensions, and other numerical values that affect your project's appearance or behavior.
5. Thinking Output
Some models are able to use reasoning abilities to plan out their actions. Clicking this brain icon will allow you to see the thinking output.

6. Source Code
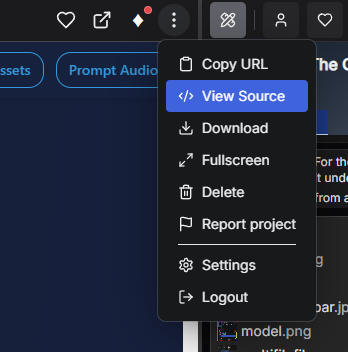
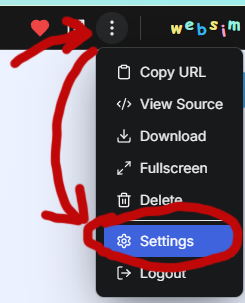
You can access your project's source code by clicking the 3 dots menu and clicking "View Source".
In the view source window, you may see a numerical count of 'Tokens'. This refers to how AI models measure the amount of computation power a project takes to iterate on.
Pro Tip: You can reference files in multifile by typing @ in your prompt. For example, "@styles.css needs a dark mode theme" would update your CSS file specifically.
7. Assets
You can add your own assets to websim projects by using the plus icon:
The plus icon allows you to upload your own files (tons of filetypes are supported!), or use the magnifying glass icon to access the asset browser. When an asset is uploaded to Websim and passes automated content moderation checks, it is then automatically added to the global Asset Browser.
The asset browser contains numerous user-uploaded images, audio files, and 3D models. Add assets by clicking the blue plus icon in the corner of each item.
Using Assets: When you add assets, your project enters a 'draft' state. To use these assets, type @ in your prompt to see a list of available assets. Select an asset and specify how to use it, like "use @background.mp3 for the background music". Sending the prompt will return your project to normal state.
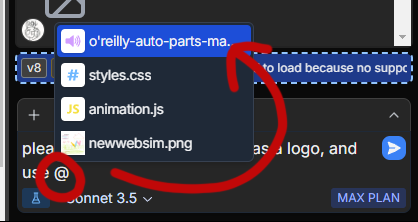
Files in multifile are also treated as assets, and can be referred to using this @ method as well. See the multifile section for an example!
8. Changing Prompt Audio
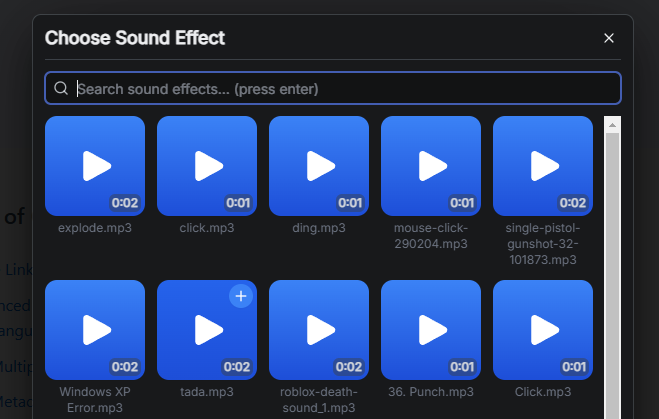
You are now able to set a custom sound for the audio that plays when you finish a prompt! To do so, start with navigating to your settings menu by tapping the 3 dots menu in the top right of Websim.
Next, you will want to find the setting titled 'Sound' and beneath it, 'Custom Effect.' To change your sound effect, click 'Browse'.
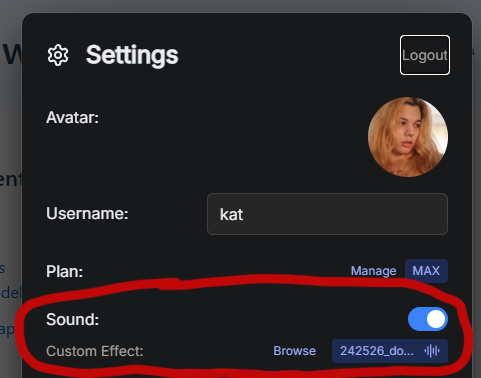
This will take you to the Sound Effects (SFX) section of the Websim Asset Browser. Here, you can preview any sound and select it as your custom prompt completed sound effect.